
The ticket is what your customer takes away. This is where you decide what goes at the top and the bottom; the middle — products and total — fills itself in with every sale.
Video coming soon
1Fill in your business details
Open Settings, at the bottom of the menu, then the Business section. The Business name, Address, Phone and Tax number you enter here are the ones the ticket prints. Click Save: the word Saved appears next to the button.
2Enter your VAT rate
Still in Business, the VAT rate field takes the rate that applies to your business. CYSOL never suggests one: enter the rate that applies to your trade and, if in doubt, ask your accountant. Left empty, your sales, tickets and invoices carry no VAT.
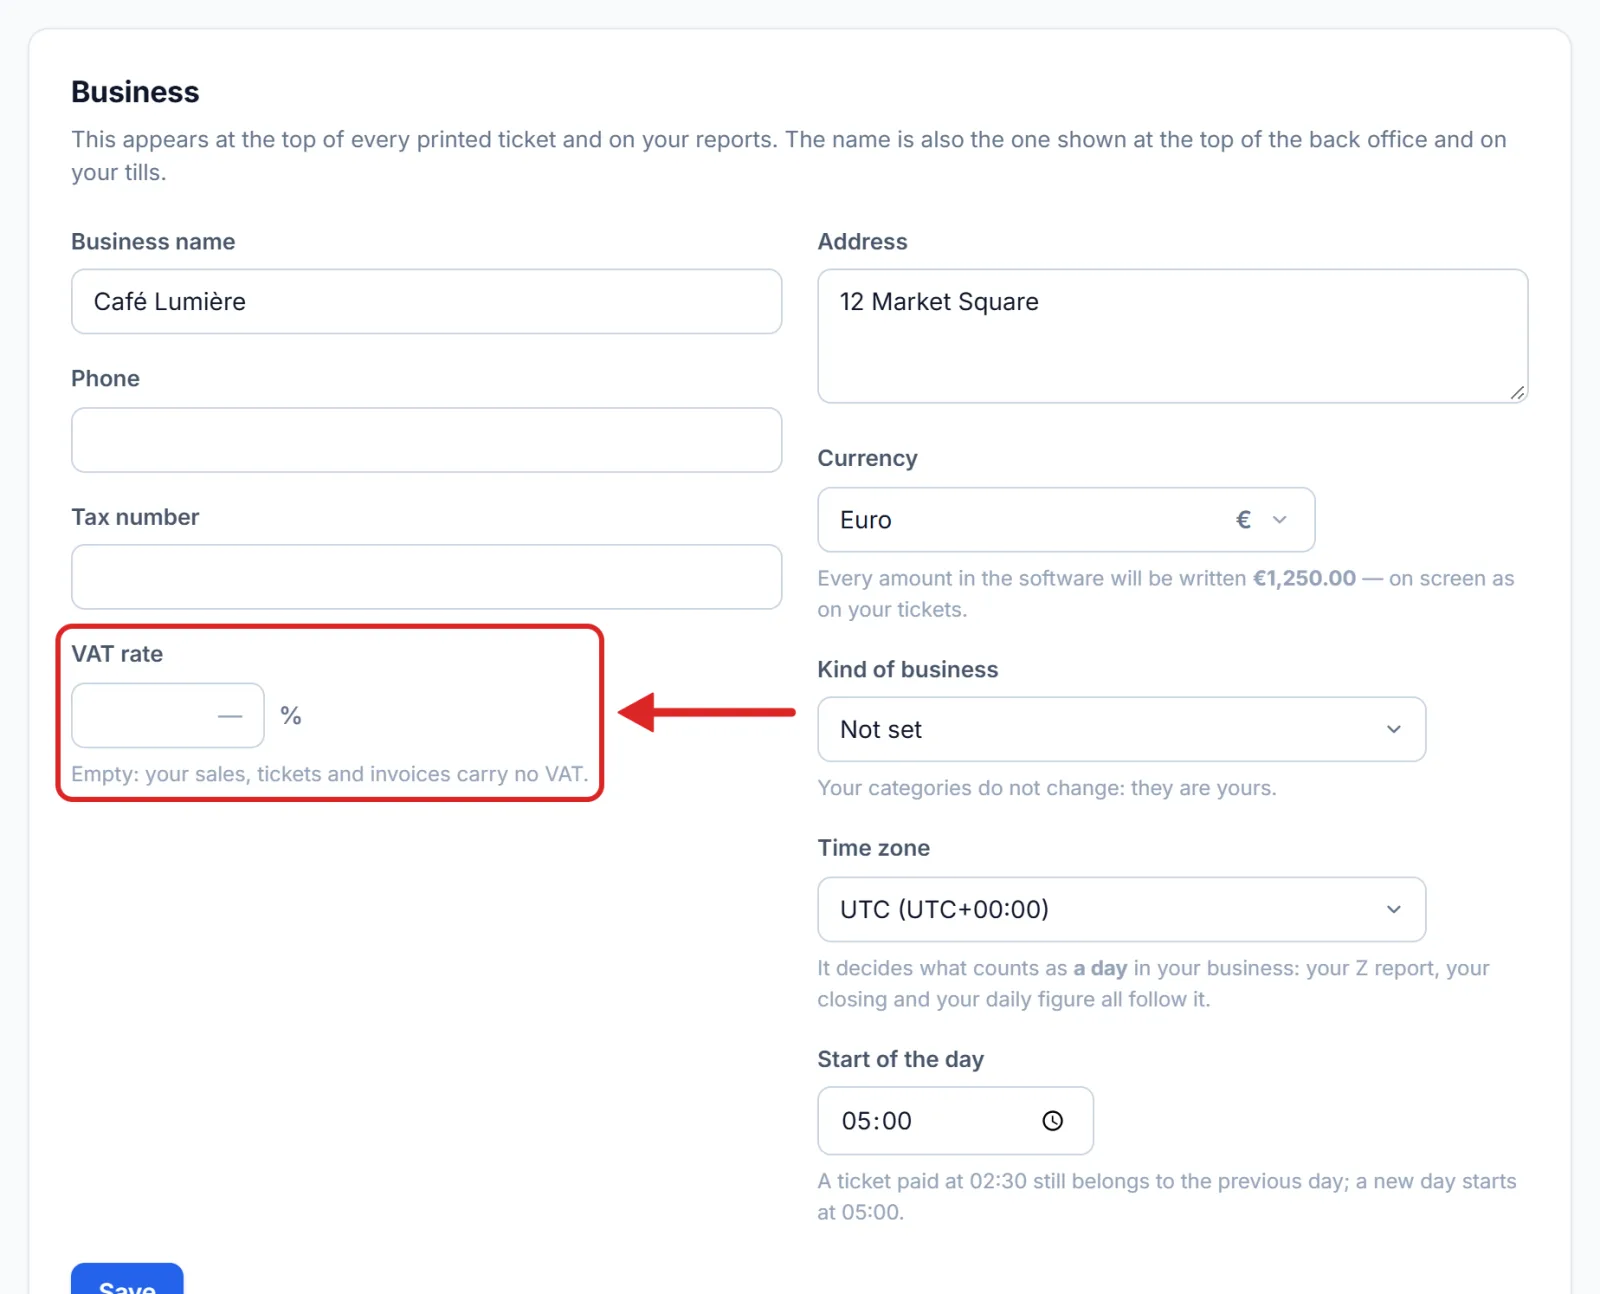
Your menu prices include tax: VAT is found within the total, never added on top. The rate is fixed onto each sale, so changing it only affects the tickets that follow.
3Choose what gets printed
Open the Printed ticket section. Under What appears on the ticket, untick anything you do not want printed: Address, Phone, Tax number, Staff name, Payment method. The Table number box only applies to table service.
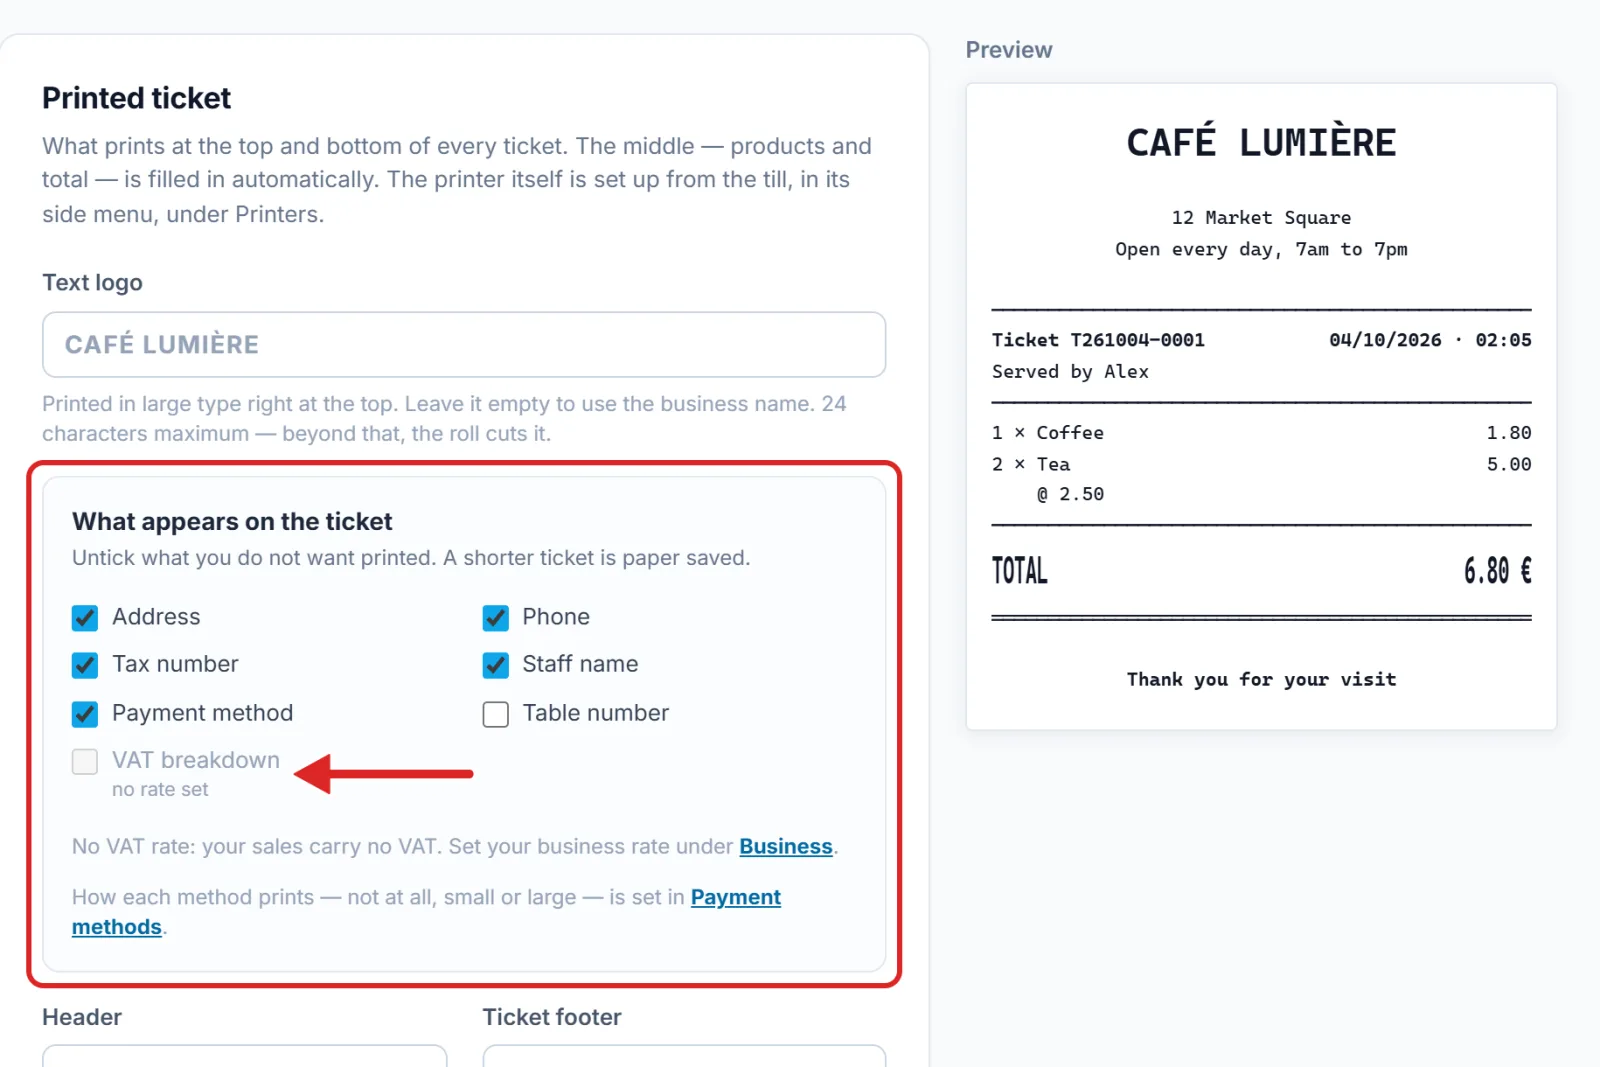
The VAT breakdown box prints the VAT on every ticket. It stays greyed out until a rate is set. Unticked, VAT is still counted on every sale, but it only prints on the invoice, from My tickets at the till.
4Write the top and bottom of the ticket
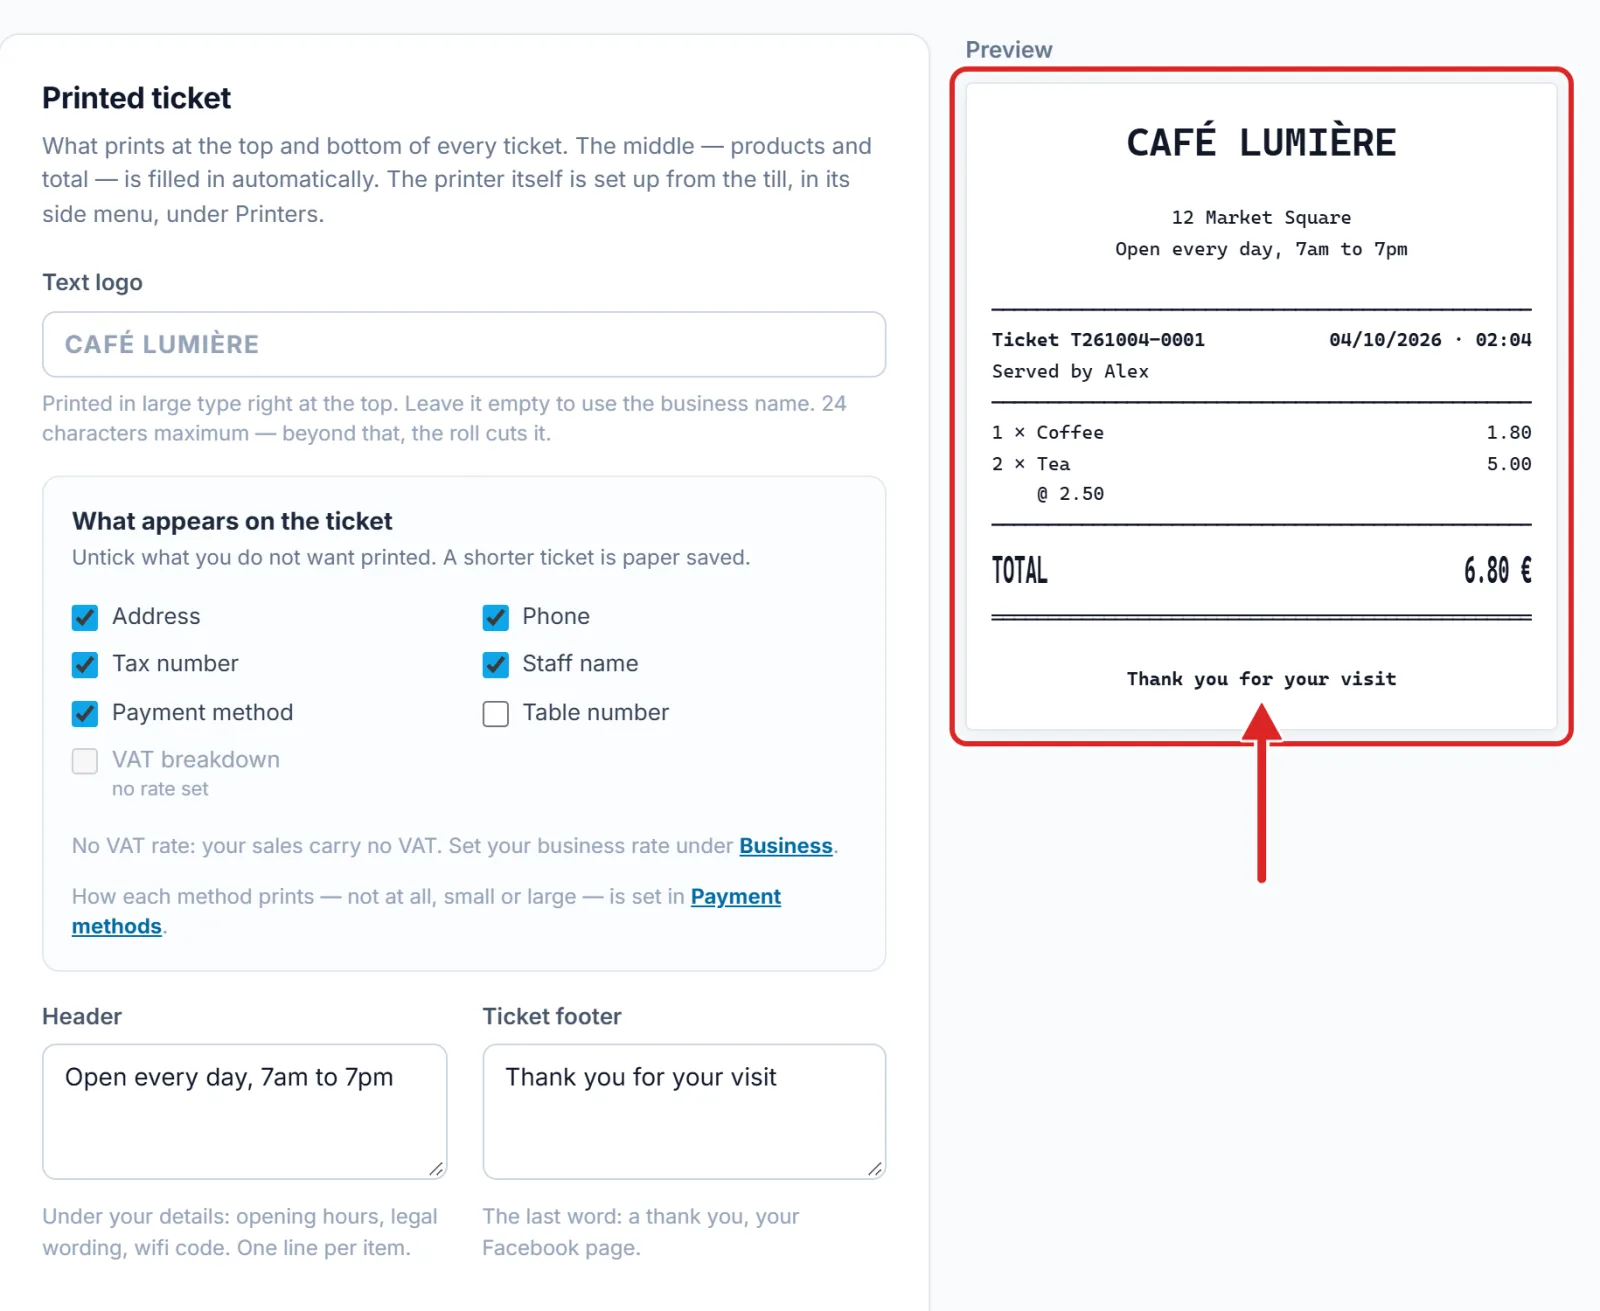
- Text logo: printed in large type right at the top. Left empty, the business name prints instead. 24 characters maximum.
- Header: under your details — your opening hours, legal wording or the wifi code. One line per item.
- Ticket footer: the closing words, such as a thank you.
On the right, the Preview shows the ticket exactly as the till will print it, and follows every letter you type. When you are happy with it, click Save.
Tip — Switch on Kitchen docket to have a second slip come out with the ticket, on the same printer: the products to prepare and their quantities, with no prices.
Important — The printer is not set up here. It is added from the till itself, in its side menu, under Printers.